AB-007
Mechanical Mounting For Vibration Motors To Bulkheads
Overview
The word bulkhead has a few different meanings, in this context we are using it to represent a large flat surface or sheet. For example, a large metal chute which is carrying materials which are prone to coagulating may require a vibration motor. This bulletin is aimed at providing different options for mounting the vibrating motor to the bulkhead.
Of course, the applications which may use bulkheads are varied and are not necessarily as large as the example above (consider, for example, the internal bulkhead of a handheld product’s enclosure). So to cover as many different situations as we can, we have produced this comprehensive guide. If you want further explanation, or you would like to discuss your own idea with us, please contact us and we would be happy to help. We have grouped different mounting techniques into the following categories:
- Glue and Adhesive Methods
- Fasteners and Clips
- Injection Moulded Mounts
It is worth mentioning that regardless of the chosen method to mount the vibration motor, noise is an important consideration. Not just electromechanical noise and interference, but vibrating bulkheads can sometimes act similar to speaker cones producing audible noise in the system. Sometimes if the noise is significant, it may be beneficial to place a thin sheet of foam between the motor and bulkhead (or motor housing and bulkhead). This will help absorb higher frequency harmonics and reduce noise. Please note this may not be required in all designs.

Get in touch
Speak to a member of our team.
Motor catalogue
Looking for our products?
Reliable, cost-effective miniature mechanisms and motors that meet your application demands.
Glue And Adhesive Methods
Adhesive Pad (Coin)
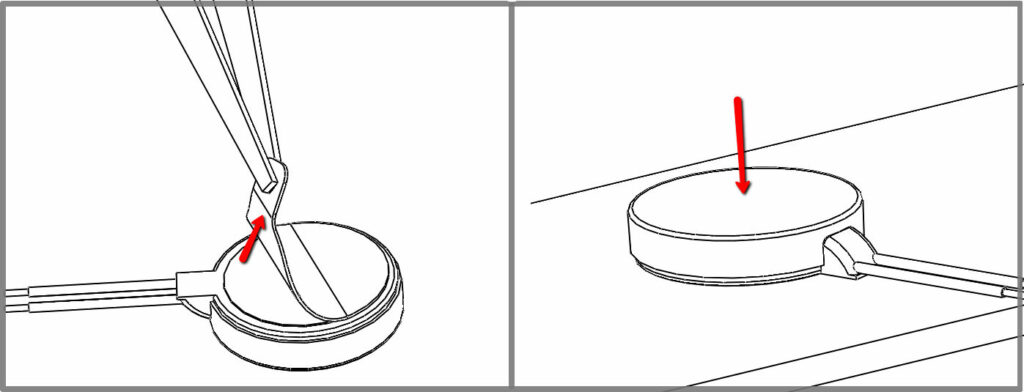
This is the simplest way to mount our coin or ‘pancake’ vibration motors and also applies to some of our Linear Resonant Actuators. All of these motors, for example, the 308-100, have an adhesive pad on the back, to stick them directly to a bulkhead or another part of the system.
These adhesive pads are simple and strong and do not require any additional brackets or accessories to secure them. Most coin vibrating motors have leads for flexible power connections, but some also come in spring pad connector form. Their low profile and easy mounting make them ideal for retrofitting to add vibration features to existing products or for last-minute design changes.
Coin vibration motors and LRAs are typically smaller motors for handheld applications, so check that the level of vibration is sufficient for your design.
Adhesive (Gluing The Motor To The Bulkhead)
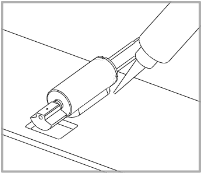
Many of our vibration motors are cylindrical and do not have obvious mounting methods, but a few do like our through-pin PCB vibration motors. For those without obvious mounting methods, it is possible to use an adhesive such as epoxy, or similar glues to mount the motor to the bulkhead or another part of the system.
Due to its simplicity, this is a popular method for prototypes and experimenters. Also, suitable adhesives are widely available and generally inexpensive. This method supports leaded motors and motors with terminals, both allow for flexible mounting options.
Attention must be taken to ensure that the adhesive is strong enough to secure the motor. The strength of the adhesive can be easily improved with the correct application on clean surfaces. Please note a ‘low blooming’ adhesive with high viscosity (i.e. don’t use low viscose cyano-acrylate or ‘super glue’ – rather use high viscosity Epoxy or hot-melt) is strongly recommended to ensure the substance does not enter the motor and glue the internal mechanism.
For extra protection, you may wish to consider our Encapsulated Vibration Motors, which are semi-sealed and therefore generally easier to glue.
Fasteners And Clips
Screwed Inverted U
Using a plastic mount that covers the motor and screws through the surface, the motor is pinned down to the bulkhead. This is a similar technique to using brackets and injection moulded mounts, which are described below.
This method supports a wide variety of cylindrical ERM motors. It may also be possible to completely house the motor such that no external moving parts are exposed. This method can attach the motor to either the top or bottom of the bulkhead and can be enhanced with an adhesive to further secure the motor.
As it requires screws to be passed through the bulkhead, the screw heads will be exposed on the opposite side (though these can, of course, be countersunk). Also, the plastic housing will increase the motor space envelope, which might be an issue for tightly enclosed designs.
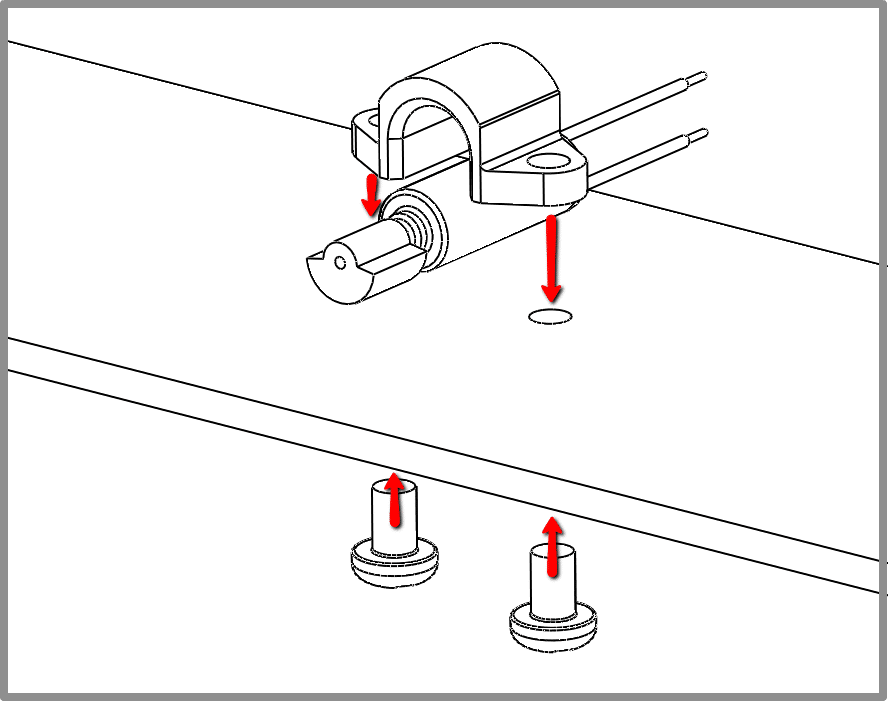
Clip Housing
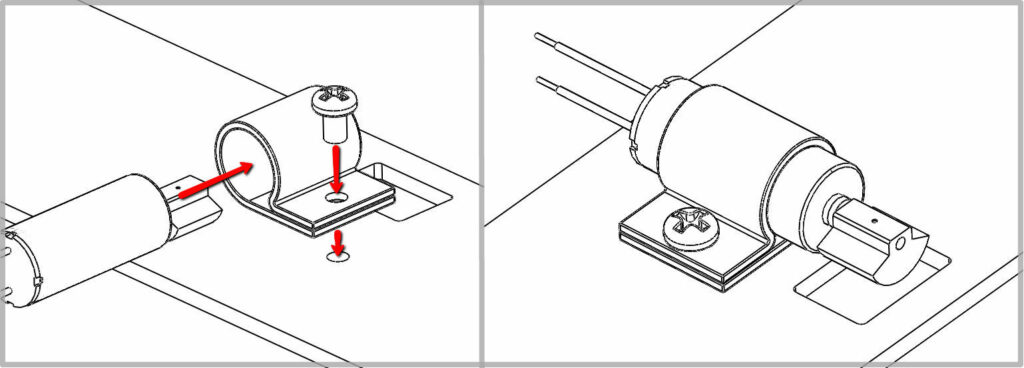
‘P Clips’, or a mounting bracket, are a popular method for securing motors to surfaces, including bulkheads and even directly on PCBs. They wrap around the motor and with two flat sections at the side (making a P shape) to screw through the bulkhead and are held in place with a screw. Other types of clips could be produced, such as an open frame which allows for the motor to be taken out and replaced (though if a high usage duty cycle is expected, you might be better of with a more permanently affixed brushless vibration motor).
Clips can often accommodate a variety of motor sizes, are simple to use and cheap to manufacture. They can securely mount the vibration motor to the bulkhead and often only require single fastener to hold the motor in place. Many off-the-shelf clips are designed for larger motors or applications, so take care to ensure that the clip will not sit loose around the motor’s body. A thin sheet of rubber or rubberised plastic can be used to any fill gaps with loose P-clips.
Remember to use a shake-proof washer or ‘grover’ with the screw – it is vibrating after-all! Consider securing fastener with locking compound (e.g. Loctite 638) as well.
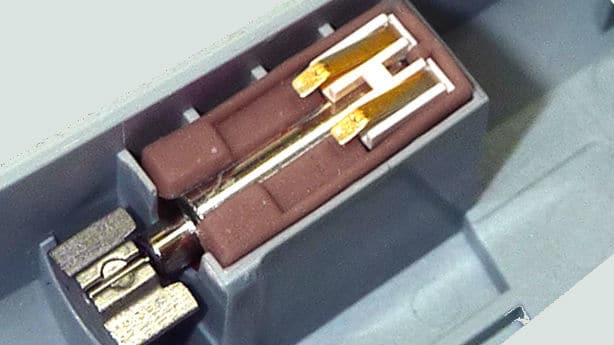
Metal Brackets
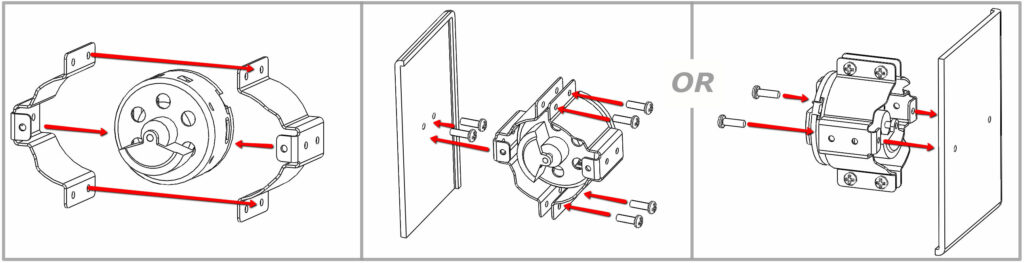

For some of our motors, we offer mounting brackets, which can be found in the Ancillary Parts section of our Product Catalogue. These are metal enclosures designed to hold the motor and include screw holes for easy attachment to a bulkhead. Several of our motors, such as the 312-401 and many others in our Uni Vibe™ range, have screw holes in their casing to fix them to the bracket.
The metal brackets are a sturdy option for those who require large vibrations or are using it in mechanical aid applications.
The image on the left shows a customised bracket that was designed for 12 mm gearmotor however the principle applies, that it is important to ensure the screw holes in the bracket match the position of the screw holes in the motor casing. When taking this approach, countersunk holes and screws will allow the motor to rotate freely.
Enclosed Motor Casings With Screws
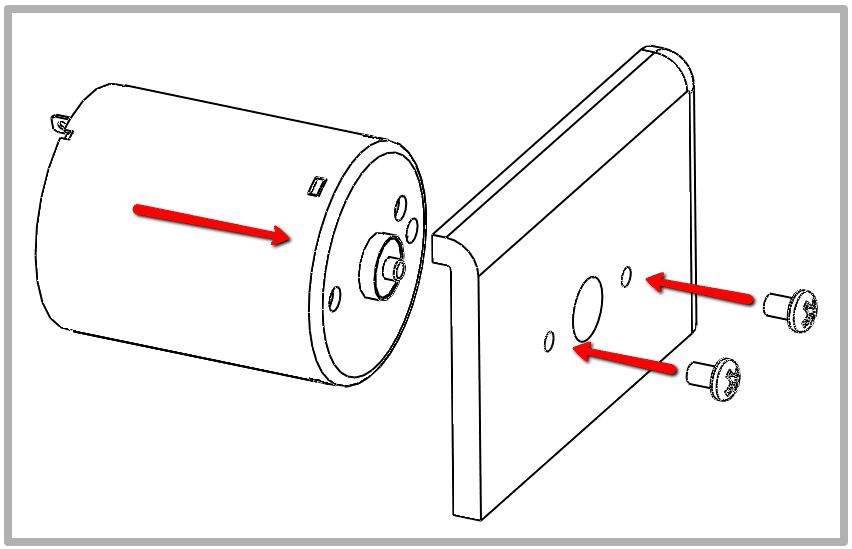
Our enclosed vibration motors have screw holes in their casing, specifically designed for attachment to brackets or directly onto bulkheads. The screw sizes and placement can be seen in the Dimensional Specifications section of the product’s datasheet.
As the eccentric mass is contained within the enclosed vibration motor’s casing, care must be taken to ensure the mounting screws do not protrude too far into the motor housing such that they block the motor’s rotation.
Injection Moulded Mounts
Moulded Mounts
Moulded mounts are injection moulded plastic housings for the motor. This method holds the body of the vibration motor within the moulded plastic housing, which is then screwed to the bulkhead. The security of the motor in the housing may be improved using an epoxy or similar silicon filler as discussed in the Glue and Adhesives section above. Please note resins must be of ‘low-blooming’ type to avoid motor damage.
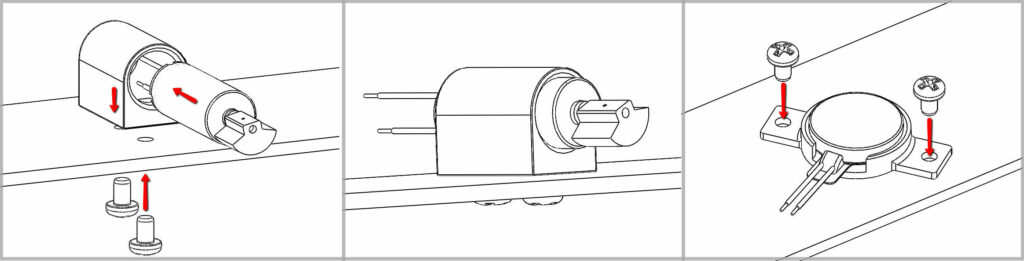
The moulded mount benefits from having a secure screw connection to the bulkhead and can provide enough space for a large eccentric mass to rotate. Similar to the Screwed Inverted U, the motor may be completely contained within the mould, removing external moving parts (for non-coin vibration motors). The use of screws means the motor can be easily removed or adjusted at a later date. In addition, as the moulds are designed for the vibrating motor they can be more secure than other methods (e.g. the side flanges of the illustrated coin motor mount).
However, the mould does add to the overall size of the motor unit, the height in particular. Also, the heads of the screws will appear on the underside of the board, although these can be countersunk.
Newsletter
Sign up to receive new blogs, case studies and resources – directly to your inbox.

Sign up
Discover more
Resources and guides
Discover our product application notes, design guides, news and case studies.
Case studies
Explore our collection of case studies, examples of our products in a range of applications.
Precision Microdrives
Whether you need a motor component, or a fully validated and tested complex mechanism – we’re here to help. Find out more about our company.