Haptic Feedback Evaluation Kit Tutorial: Connecting an External Actuator
Looking for our Haptics range? View our main Haptics hub here.
Introduction
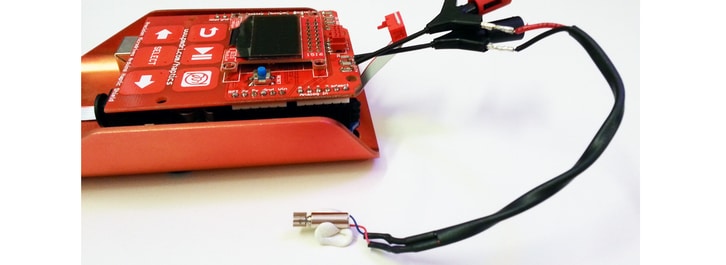
Looking to test an ERM or LRA outside of the grip? Even mounted in your own prototype device?
Using an external actuator with the Haptic Feedback Evaluation Kit is extremely simple. In general, there are two things you need to do:
- Unplug the Haptic Grip
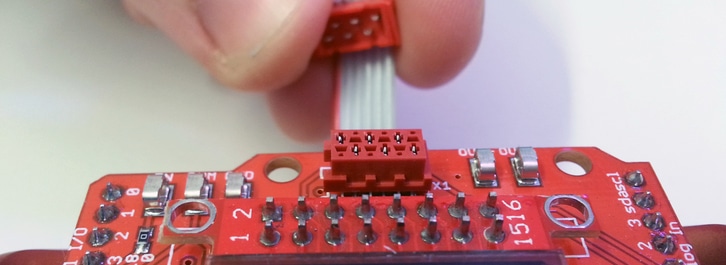
- Connect the actuator to the SMD test points OUT- and OUT+
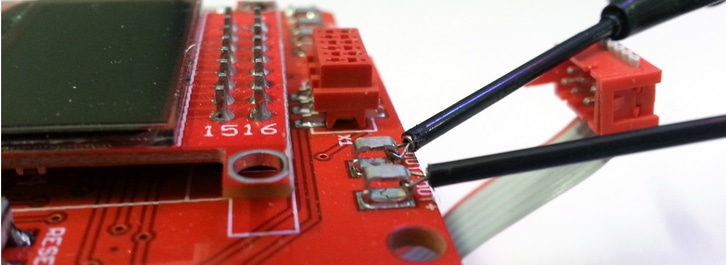
That’s it! Your actuator now receives the drive signal immediately from the DRV2605, before it reaches any switch or another component. It is intended to be as pure a connection to the haptic driver as possible – it is, therefore, unable to connect the MOSFET. For information on how to use vibration alerting with an external actuator, read our guide here.
However, there are some other aspects to consider:
- Mode of Operation
Intro Mode and Engineering Mode are designed to work with the Haptic Grip and run with the assumption that it is connected. Therefore if you connect an LRA as an external actuator, but your Engineering Mode has the 305-000 ERM selected nothing will happen when you try to play an effect.
Try to select the correct type of actuator on the Haptic Controller, for example, if you connect an ERM select one of the ERMs (cycling the PMD button) in the menu system. This leads us on to…
- Motor Ratings
Make sure your actuator fits within the operating constraints of the DRV2605, see the datasheet here.
If you are testing in the Engineering Mode and don’t wish to edit the code manually, try to select the ERM that is closest to the specification (particularly voltage and operating current) of your external actuator.
Calibration
The DRV2605 has an auto-calibration feature that compensates the drive signal for the specific actuator. The Intro Mode and Engineering Mode handle this for you automatically, in the latter you can clear the stored values to re-calibrate using the debugging feature (user manual here). However, when using the Development Mode you need to make sure you are using an appropriate value in the functionselectMotor( motorID ); so that functionautoCalibrate(); works correctly.
See the tutorial on calibrating the DRV2605 for more information.

Get in touch
Speak to a member of our team.
Motor catalogue
Looking for our products?
Reliable, cost-effective miniature mechanisms and motors that meet your application demands.
Newsletter
Sign up to receive new blogs, case studies and resources – directly to your inbox.

Sign up
Discover more
Resources and guides
Discover our product application notes, design guides, news and case studies.
Case studies
Explore our collection of case studies, examples of our products in a range of applications.
Precision Microdrives
Whether you need a motor component, or a fully validated and tested complex mechanism – we’re here to help. Find out more about our company.