Haptic Feedback Evaluation Kit Tutorial: Calibrating the DRV2605 for a Specific Motor
Looking for our Haptics range? View our main Haptics hub here.
Development Mode Series: Calibrating The DRV2605 For A Specific Motor
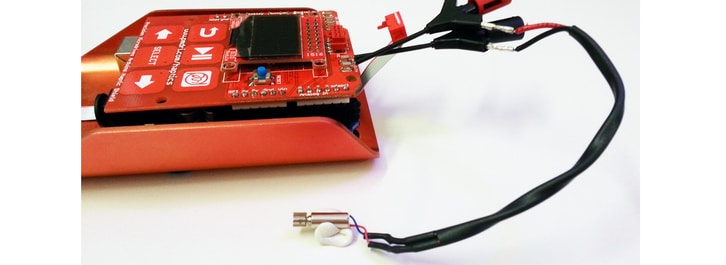
Whether you’re using the Haptic Grip or your own external actuator, you should calibrate the DRV2605 to the specific motor you are using.
The auto-calibration process monitors the back-EMF of the actuator and uses the results to adjust the output from the driver so the haptic waveform is tailored for that exact actuator. More information on this can be found on the DRV2605 datasheet.
If using the Haptic Grip you first need to select the motor that you intend to use, the un-edited DevelopmentMode.ino selects the motor 305-000 and calibrates it in lines 52 and 53. See the DRV2605 Library resource for the values of the other actuators, e.g. to use the C10-100 use the following code:selectMotor( 3 );
autoCalibrate();
If using an external actuator you must still call the functionselectMotor ( motorID );, the reliesautoCalibrate(); on it and you must calibrate the motor before playing an effect on it.
If your external actuator is an LRA, use a value of 3 for the motorID parameter. Values 0 – 2 are the 3 ERMs in the grip and any of these values can be used for an external ERM, try to select the one that is closest to the specification of your external actuator.
The alternative is to manually calibrate the actuator yourself. This may be useful if you wish to test an actuator that is dramatically different from those included in the grip.
Manually Calibrating The Motor
DRV2605.cpp includes the functionality for manually setting the motor values, but letting the DRV2605 handle its own calibration.
The function allowsautoCal(); you to enter the values for the rated voltage and the overdrive clamp but still allows the DRV2605 to perform the auto-calibration process, storing the values for compensation, back-EMF, and feedback in the appropriate register. See the DRV2605 Library reference and DRV2605 datasheet for how to calculate the values.
This is available for both ERMs or LRAs.
For example, let’s say we wanted to use the 307-100 as an external actuator with the Haptic Feedback Evaluation Kit. We would use the following:
Rated Voltage = 3 V = ratedVoltage×5.44V255ratedVoltage×5.44V255
Therefore rated voltage = 142.
Max Operating Voltage = 3.6 V = overdriveClamp×5.6V255overdriveClamp×5.6V255
Therefore overdriveClamp = 164.
LRA = False (or 0)
Our code would be:
DRV2605.autoCal( 142 , 164 , 0 , &compensation , &backEMF , &feedback );
Overriding The DRV2605 Auto-Calibration Feature
Don’t trust fancy features? Just curious? Maybe you’re just a maverick coder who knows exactly what you want! There are lots of reasons you may want to use your own values for compensation, back EMF and feedback so we’ve included this functionality.
Use the functionplayFullHaptic(); in DRV2605.cpp to take complete control of the effect you play and how you play it. This is different from the function found in motor.cpp.
See the DRV2605 Library resource and the DRV2605 datasheet for the syntax and information on how to calculate the values.


Get in touch
Speak to a member of our team.
Motor catalogue
Looking for our products?
Reliable, cost-effective miniature mechanisms and motors that meet your application demands.
Newsletter
Sign up to receive new blogs, case studies and resources – directly to your inbox.

Sign up
Discover more
Resources and guides
Discover our product application notes, design guides, news and case studies.
Case studies
Explore our collection of case studies, examples of our products in a range of applications.
Precision Microdrives
Whether you need a motor component, or a fully validated and tested complex mechanism – we’re here to help. Find out more about our company.