AB-016
Experiments In Waterproofing / Overmolding Vibration Motors
Introduction
In our Tech Blog, we have mentioned some interesting vibration motor applications which may benefit from being waterproof or water-resistant. For example, performance indicators for athletes, or stroke rehabilitation gloves would require regular cleaning. Naturally, the most convenient method for cleaning clothes and garments would be through a washing machine, and removing several vibration motors to do so, isn’t particularly pragmatic.
Our Application Bulletin 010: Mounting Vibration Motors to Flexible Materials and Clothing has a couple of different applications where the vibration alerting or haptic feedback system would be much more practical if waterproof. It also includes a short section which acts as a precursor to this bulletin.
So we decided to look at some of our vibration motors and see if it would be possible to make them waterproof using fairly simple and easily implemented methods. This means that this Application Bulletin will differ slightly from our normal instalments which are full of industry best practices and advice. Instead, this is more a report of an experimental/investigative process, in which we conclude with tips from our experiences, should you wish to try it yourself.

Get in touch
Speak to a member of our team.
Motor catalogue
Looking for our products?
Reliable, cost-effective miniature mechanisms and motors that meet your application demands.
The Approach
Vibration Motor Selection
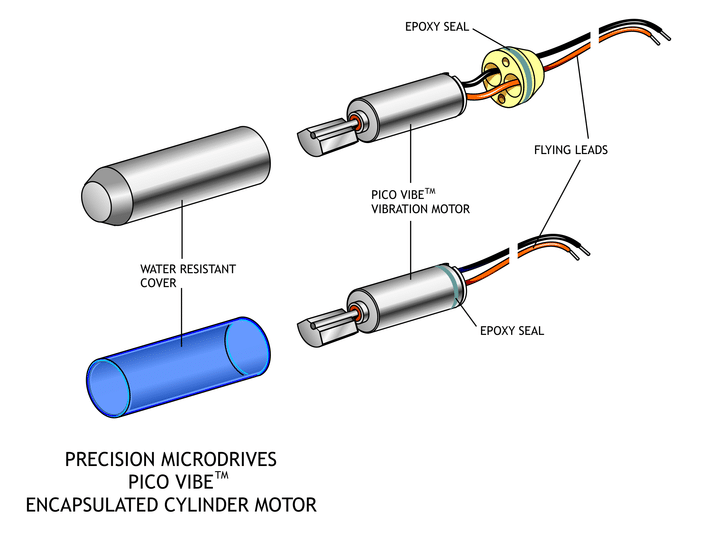
We first looked at what types of vibration motor would be easiest to seal, to increase the chance of success. Immediately we looked towards our encapsulated vibration motors as these have no external moving parts, have insulated leads as connectors, and are already sealed to a limited extent.
In addition, we considered that some of our coin vibration motors would also be successful. These too have no external moving parts though, unlike the encapsulated motors, no production attempts have been to cover several obvious points of ingression. Coin motors are also available in different diameters, so we could test if the size was a factor in the success rate.
We, therefore, selected 5 vibration motors for testing:
- Encapsulated Vibration Motors
- 306-108 (since depreciated)
- 307-100 (since depreciated)
- Coin Vibration Motors
Techniques For Waterproofing
To ensure the motors were waterproof, we needed to seal the gaps in the motors’ casings and any other potential area where liquid could enter.
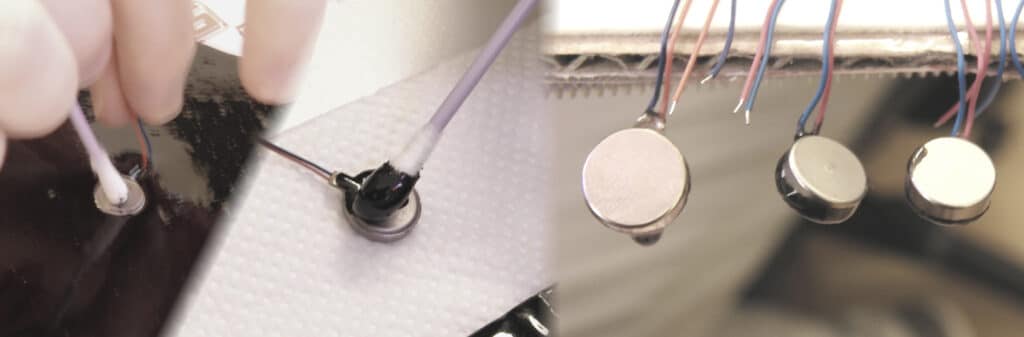
For the encapsulated vibrating motors, the main area of concern was the point where the connection leads entered the motor casing. Furthermore, on the 307-100, there is a visible line around the base of the casing where the blue encapsulation case interfaces with the motor end cap. For the 306-108, there is a bright yellow end cap that interfaces with the metal encapsulation cylinder. Where the connection leads pass-through this yellow plastic, they are secured with black epoxy to improve sealing.
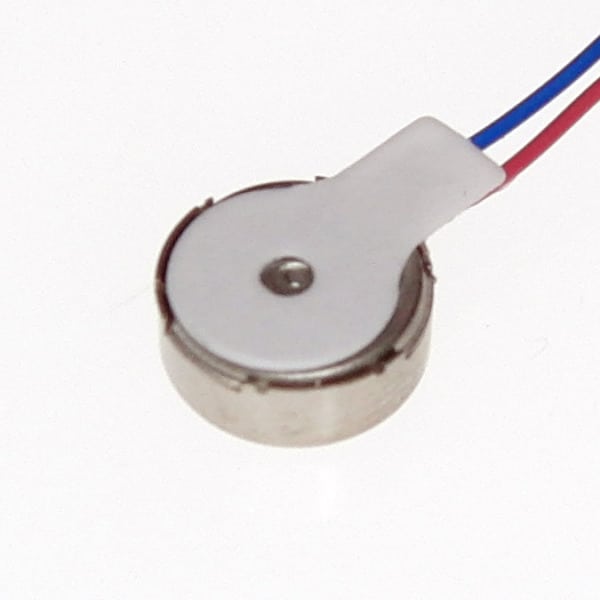
For coin vibration motors, our main concern is sealing the gap between the bottom and top of the casing, which can be seen by the small slots on either side of where the leads are soldered. In the image below you can see a clear spacing between the two sections of the case which could be susceptible to liquid ingression.
There are many different substances that could be used as sealants and we had two main requirements; One that the sealant be ‘low-blooming’ (if applicable), and two that it was high viscosity.
Blooming adhesives and resins can enter the motor as the glue sets through evaporation, and coat the commutator mechanism with a fine layer of electrically insulating material, preventing it from working. Cyano Acrylate (super glue) is infamous for this behaviour.
Viscosity is a measure of how thick or thin a liquid is, and the higher the number the thicker the fluid. The thicker the sealant the less likely it would be to ingress into the motor and prevent the eccentric mass from moving.
In the end, we settled on two; an epoxy resin kit and a potting compound mix.
Expected Results
We were most confident about the encapsulated motors being successfully sealed. This is because their cases were already the closest to being waterproof; any joins in the case were very small and the lead connections were inside the casing. This also led us to believe that the 312-103 coin motor would be the least successful case as it had the largest gap between the chassis and cover; it would allow more of the sealant to seep in the gaps and foul the mechanism.
Another problem for coin vibration motors is their low profile. If any of the sealant was to enter the casing then it would immediately be next to the internal eccentric rotating mass. Conversely for the encapsulated motors, if any liquid was to enter it would have to travel the length of the motor casing to impede the motor rotation.
With regards to the two substances used, we had no preconceived ideas or expectations as to which would provide more reliable and more consistent sealing.
The Procedure
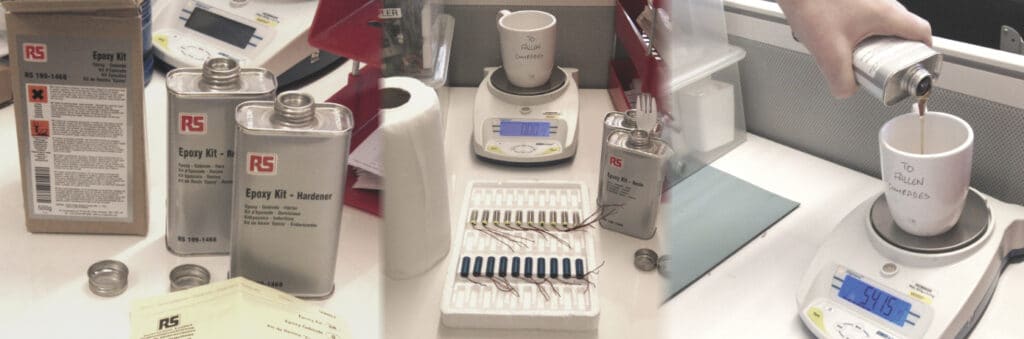
First, we set aside 10 of each motor type and prepared the sealants. The epoxy was made from mixing a resin and a hardener, both supplied in one kit. The mixing quantities will vary between brands and is done by weight, too little hardener can cause the epoxy to remain soft once set, while too much can cause it to be brittle when set and harder to work with before it sets.
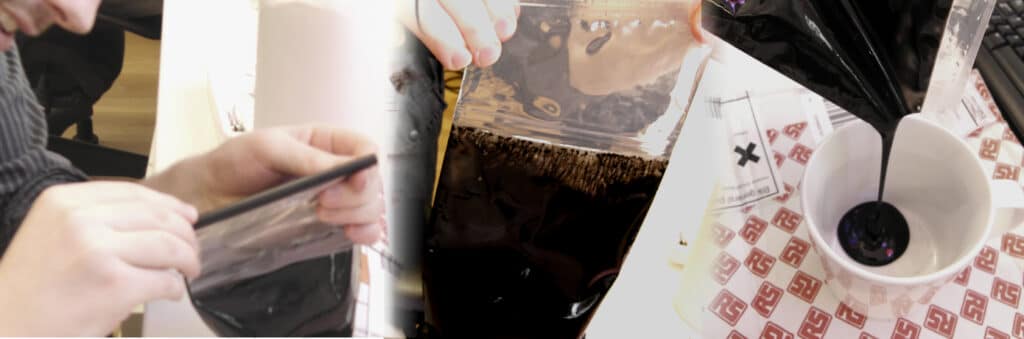
The potting compound was easier to mix as both the resin and hardener came in one bag (so the mixing quantities were accurate) with a clip keeping the two compartments separated until use. However, this does mean that the entire bag must be used in one go, making this experiment a little wasteful:
When mixing the two sealants, it appeared that the epoxy was less viscous than the potting compound. For this reason, we decided not to use the epoxy on the coin vibrating motors as we were already unsure how successful these would be and believed the thicker potting compound would be less likely to enter the casing. We also kept aside 3 of the 306-108 to test with no modification. The breakdown was as follows:
| Vibration Motor | Type | Epoxy | Potting Compound | No Modification |
| 306-108 | Encapsulated | 4 | 3 | 3 |
| 307-100 | Encapsulated | 5 | 5 | 0 |
| 308-100 | Coin | 0 | 10 | 0 |
| 310-103 | Coin | 0 | 10 | 0 |
| 312-103 | Coin | 0 | 10 | 0 |
When applying the sealants to the motors, we took three different approaches. For the less viscous epoxy, we fully submerged the motors to ensure a complete sealing of the case:
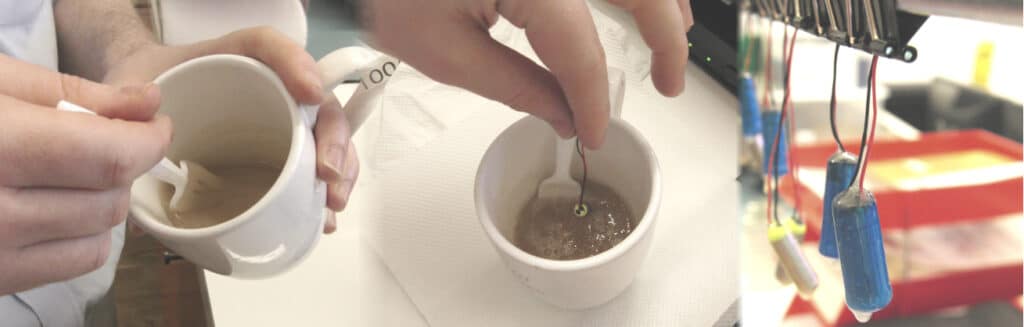
However, when using the potting compound we used two different techniques. First, we used a similar method as with the epoxy by ‘dunking’ some of the coin vibration motors face down in a plate of epoxy, although not fully submerging them. For the encapsulated vibration motors and some of the coin vibration motors we carefully applied the sealant to the motors using a cotton bud tip, taking extra care to cover the main areas of concern (the case gaps and electrical connectors):
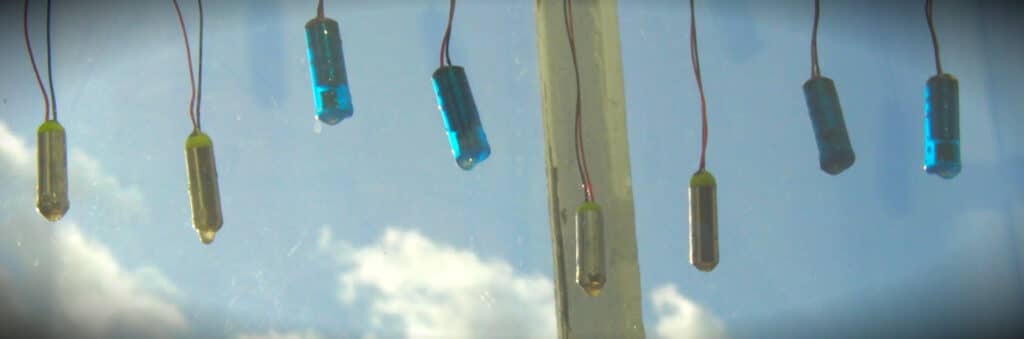
Whether using the epoxy or the potting compounds, the motors required time for the sealant to set. With a makeshift drying stand, the motors were hung out for over 24 hours:
The Results
There were noticeable differences once the sealants had set. from the image below we can see how the epoxy has added to the length of each motor, especially at the tip where a drip shape has formed:
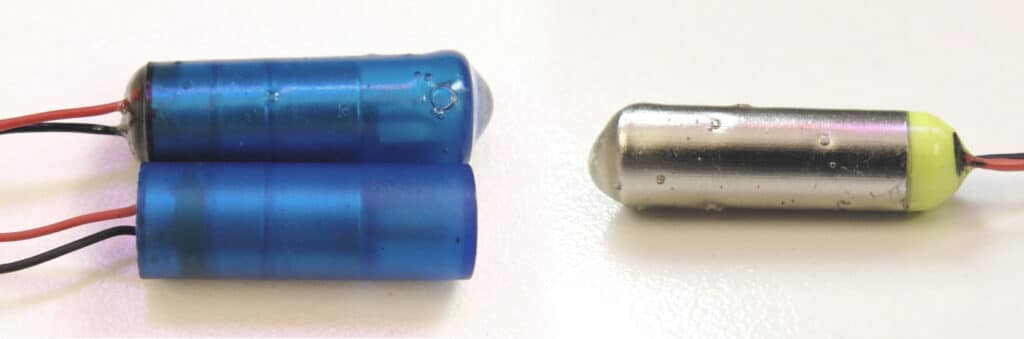
More importantly, on the 307-100 we can see that the motor end-cap end (which is what we were most concerned with sealing) appears to have a good layer of the application to cover the leads and the case’s gaps. This is less prominent on the 306-108, most likely due to its sloped yellow end, unlike the 307-100’s flat end. However, from visual inspection, we could see the 306-108’s connection leads and the whole body had taken a thin layer of epoxy.
The potting compound was easier to see as its dark colour makes it pretty obvious! Interestingly with the coin vibration motors, in some cases, the potting compound sat raised and looked thick and smooth, although in others it looked thin and uneven.
After a quick visual inspection of all the motors, we moved to electrical testing. First, we checked the motors to see if they still turned, finding the following results:
| Vibration Motor | Type | Epoxy (Successes / Tested) | Potting Compound (Successes / Tested) |
| 306-108 | Encapsulated | 4 / 4 | 3 / 3 |
| 307-100 | Encapsulated | 3* / 5 | 5 / 5 |
| 308-100 | Coin | 0 | 10 / 10 |
| 310-103 | Coin | 0 | 7 / 10 |
| 312-103 | Coin | 0 | 3 / 10 |
There are a couple of interesting points in the results. We can immediately see that the encapsulated vibration motors were affected less by the application of sealant. In fact, only one 307-100 failed to turn and although another still vibrated it had developed a rattle (hence the asterisk).
The more viscous potting compound was more successful for encapsulated vibration motors and worked very well for smallest coin vibration motors. Also, when we consider the application methods, we notice that the motors which had the compound ‘brushed’ on (instead of ‘dunked) were much more likely to turn. See the table below for more details:
| Vibration Motor | Sealant | Brushed (Successes / Tested) | Dunked (Successes / Tested) |
| 308-100 | Potting Compound | 3 / 3 | 7 / 7 |
| 310-103 | Potting Compound | 3 / 3 | 4 / 7 |
| 312-103 | Potting Compound | 3 / 5 | 0 / 5 |
For the 10mm and 12mm coin motors, we can see that the brushed technique had a 6 of 8 motors pass, but the dunked had only 4 from 12 passes.
After testing to see which motors were still functioning, we then moved onto the all-important underwater test. To do this we submerged each motor in a cup of water, then slowly increased the power supply to the motor’s rated voltage. This was fairly simple as all the motors had leaded power connectors meaning we were easily able to connect the motor safely to a PSU out of the water while keeping the vibration motor in the water.
REMEMBER: Using electronics around water can be dangerous even low voltages, so understand what you are doing, and have a companion/colleague nearby.
To our surprise, the results were excellent. All of the sealed motors tested vibrated underwater, showing that if the motor had survived the sealing process it would be waterproof.
In addition, we tested 3 of our 306-108 motors underwater without any modification. All three of these encapsulated vibration motors were also successful. This suggests that the epoxy and potting compound tests were somewhat redundant, however, these methods can be used for additional peace of mind.
Conclusions
Before listing our full list of conclusions we thought we should reiterate our initial disclaimer:
None of the motors mentioned in this Application Bulletin are IP rated and following this process does not make them IP rated!
Nevertheless, this was an interesting experiment. We believe some of our findings would provide a good platform from which others can build if you follow these steps and have your own interesting conclusions we would love to hear from you.
- Highly viscous substances were less likely to ingress and cause the motor to fail
The epoxy caused two failures in the 307-100, which we believe were due to the sealant liquid entering the motor casing and impeding the rotation of the eccentric mass. One of the two failures actually turned and vibrated, but had developed a loud rattle.
We came to this conclusion from a visual inspection. The distinctive blue case of the 307-100 is not completely opaque, and looking closely you can clearly see the motor and eccentric mass inside. This means traces of the dark potting compound could be seen through the case, and in some instances, the black mixture had made it halfway down the internal motor case. It is likely that the less viscous epoxy mix would have penetrated even further.
- The sealant application method is just as important
From the coin motors results, we were able to see that a careful brushing application of the potting compound was much more effective than the (quicker) ‘dunking’ method. This suggests that the application method could have a major impact on success rates just as with the choice of sealant and vibration motor.
- Visual inspection unable to determine the success rate of coin motors
We mentioned earlier that some of the coin vibration motors had a thick smooth layer of potting compound, and others had a thin and lumpy layer. The thin ones often had a dark ring around the casing join where more of the compound had collected, looking like it had seeped into the motor.
However, it was discovered that the visual appearance of the sealant’s application, which is often associated with quality, had no performance impact on the vibration motor. In fact, the only scenario where it was possible to deduce by visual inspection that a motor had failed was using the dark potting compound with the 307-100.
- The larger the diameter of coin vibration motors, the more likely the sealant will enter the case and cause failure
This was fairly obvious from our test results. Our 8mm coin vibration motors were 100% successful, regardless of application method. With 12mm diameters this fell to 30%, with all (5) of the ‘dunked’ motors failing.
- The 306-108 worked underwater without any modification
As we explained in the Procedure section, our 306-108 vibration motor did not require either the epoxy or the potting compound to be used submerged in water.
Finally, it should be noted that often sealing is useful for over-moulding, in which case high pressures may be applied (depending on moulding technique). Without easy access to an overmoulding facility, we made do with water, however, it wasn’t of course under pressure. If you consider overmoulding after sealing using recommendations in this bulletin, please let us know – we’d love to hear from you.
Newsletter
Sign up to receive new blogs, case studies and resources – directly to your inbox.

Sign up
Discover more
Resources and guides
Discover our product application notes, design guides, news and case studies.
Case studies
Explore our collection of case studies, examples of our products in a range of applications.
Precision Microdrives
Whether you need a motor component, or a fully validated and tested complex mechanism – we’re here to help. Find out more about our company.